- A+
在页面加载时,主动执行某些程序。
模拟场景:当页面加载完成之后,像是后台加载数据
new Vue()就是初始化一个Vue实例。
Vue实例额生命周期钩子(函数):每个Vue实例在被创建时(new Vue)都要经过一系列的初始化过程
例如:created() 组件初始化完成
mouted() 模板已创建
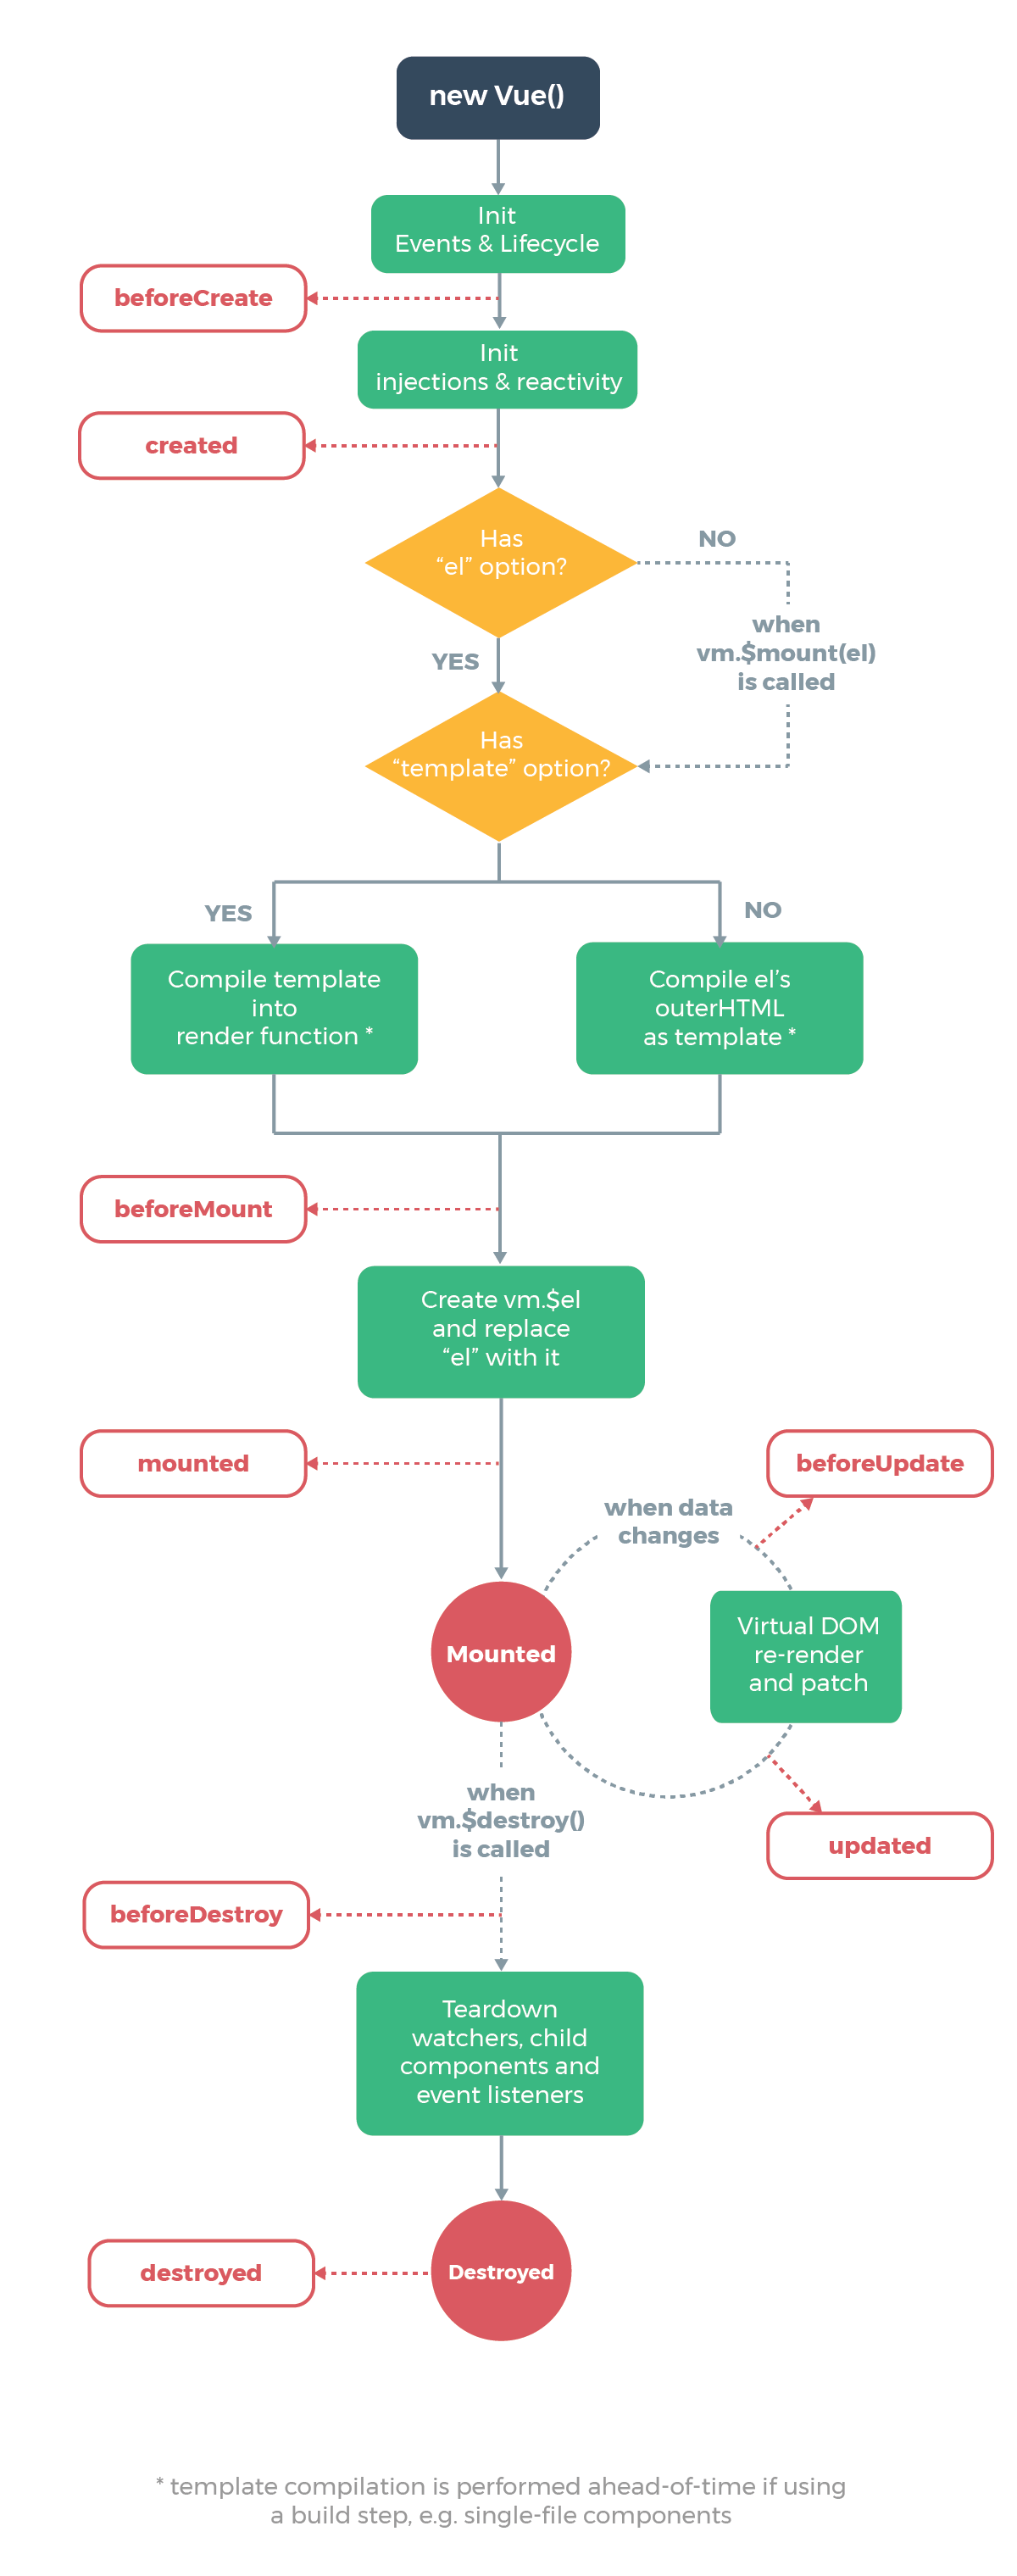
这是官方文档给出的一个组件从被创建出来到最后被销毁所要经历的一系列过程,所以这个过程也叫做一个组件的生命周期图。从图中我们可以看到,一个组件从被创建到最后被销毁,总共要经历以下8个过程:
1、beforeCreate:组件创建之前
2、created:组件创建完毕
3、beforeMount:组件挂载之前
4、mounted:组件挂载完毕
5、beforeUpate:组件更新之前
6、upated:组件更新完毕
7、beforeDestoy:组件销毁之前
8、destoyed:组件销毁完毕

了解了组件生命周期各个过程后,我们放一波代码,真正的看一看一个组件从生到死到底经历了什么。
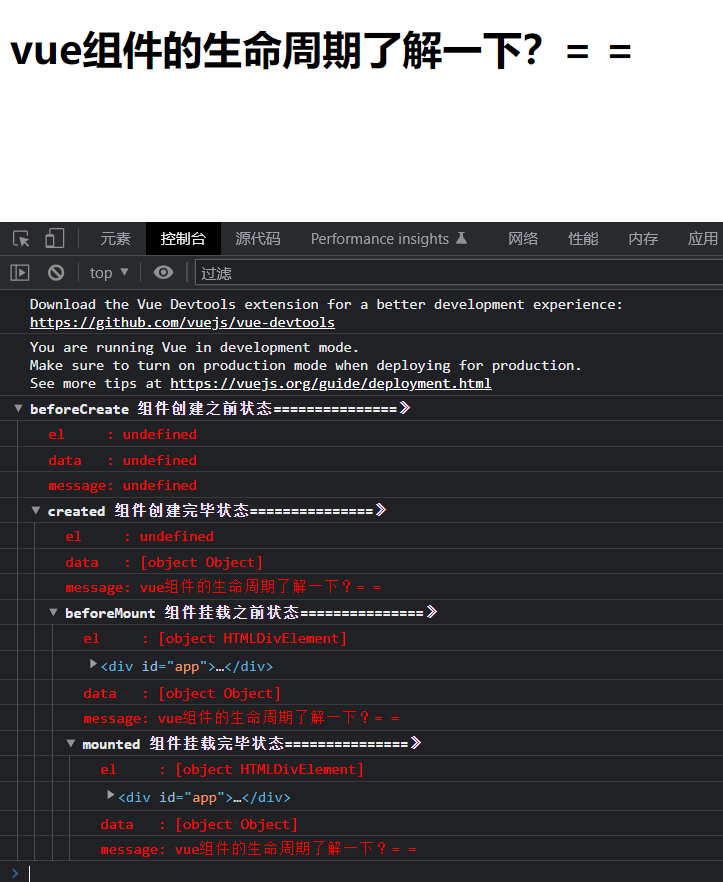
<body> <div id="app"> <h1>{{ message }}</h1> </div> <script src="https://cdn.jsdelivr.net/npm/vue@2.7.8/dist/vue.js"></script> <script> var app = new Vue({ el: '#app', data: { message : "vue组件的生命周期了解一下?= =" }, //组件创建之前 beforeCreate(){ console.group('beforeCreate 组件创建之前状态===============》'); console.log("%c%s", "color:red" , "el : " + this.$el); console.log("%c%s", "color:red","data : " + this.$data); console.log("%c%s", "color:red","message: " + this.message) }, //组件创建完毕 created(){ console.group('created 组件创建完毕状态===============》'); console.log("%c%s", "color:red","el : " + this.$el); console.log("%c%s", "color:red","data : " + this.$data); console.log("%c%s", "color:red","message: " + this.message); }, // 组件挂载之前 beforeMount(){ console.group('beforeMount 组件挂载之前状态===============》'); console.log("%c%s", "color:red","el : " + (this.$el)); console.log(this.$el); console.log("%c%s", "color:red","data : " + this.$data); console.log("%c%s", "color:red","message: " + this.message); }, // 组件挂载完毕 mounted(){ console.group('mounted 组件挂载完毕状态===============》'); console.log("%c%s", "color:red","el : " + this.$el); console.log(this.$el); console.log("%c%s", "color:red","data : " + this.$data); console.log("%c%s", "color:red","message: " + this.message); }, // 组件更新之前 beforeUpdate(){ console.group('beforeUpdate 组件更新之前状态===============》'); console.log("%c%s", "color:red","el : " + this.$el); console.log(this.$el); console.log("%c%s", "color:red","data : " + this.$data); console.log("%c%s", "color:red","message: " + this.message); }, // 组件更新完毕 updated(){ console.group('updated 组件更新完毕状态===============》'); console.log("%c%s", "color:red","el : " + this.$el); console.log(this.$el); console.log("%c%s", "color:red","data : " + this.$data); console.log("%c%s", "color:red","message: " + this.message); }, // 组件销毁之前 beforeDestroy(){ console.group('beforeDestroy 组件销毁之前状态===============》'); console.log("%c%s", "color:red","el : " + this.$el); console.log(this.$el); console.log("%c%s", "color:red","data : " + this.$data); console.log("%c%s", "color:red","message: " + this.message); }, // 组件销毁完毕 destroyed(){ console.group('destroyed 组件销毁完毕状态===============》'); console.log("%c%s", "color:red","el : " + this.$el); console.log(this.$el); console.log("%c%s", "color:red","data : " + this.$data); console.log("%c%s", "color:red","message: " + this.message) } }) </script> </body> 运行上面代码,我们在控制台中可以看到:

我们并没有使用任何事件,就触发了这个函数
created和mounted是有顺序的,和写的上下顺序无关,都是先执行created在执行mouted
<template> <div id="app"> </div> </template> <script> export default { mounted() { console.log("这是mounted函数的内容") }, created() { console.log("这是created函数的内容") } } </script> <style> </style> 
有时候我们想操作html的时候,在created中写是获取不到元素的,在mouted可以,初始化数据的话在created里面就可以
如果我们想异步加载数据的话,就可以把获取数据的方法写在生命周期函数中
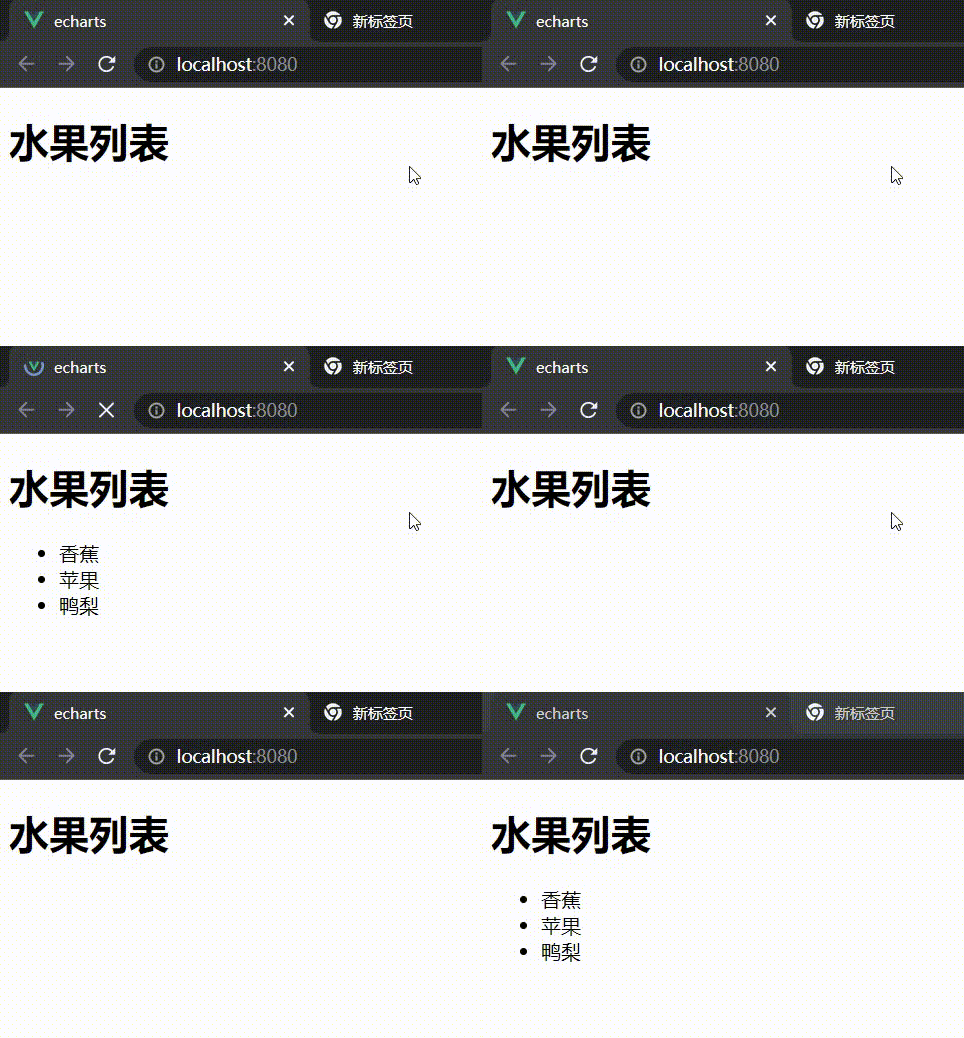
我们异步来加载水果列表
通常页面的数据我们是通过异步和服务器获取的,而不是直接写在data中的,而是应该写在methods中的getData(),将数据放进data中,使用计数器来模拟Ajax的异步获取数据,在created中调用getData()方法
<template> <div id="app"> <h1>水果列表</h1> <ul> <li v-for="(item,index) of fruitList" :key="index"> {{item}} </li> </ul> </div> </template> <script> export default { data () { return { fruitList:[] //初始状态下,这里不放数据 } }, methods: { getData() { //通过计数器,模拟一个ajax获取数据的方法 setTimeout(()=> { this.fruitList = ["香蕉","苹果","鸭梨"] },2000) } }, //使用created方法来调用getData获取数据 created() { this.getData() } } </script> <style> </style> ``
异步加载演示

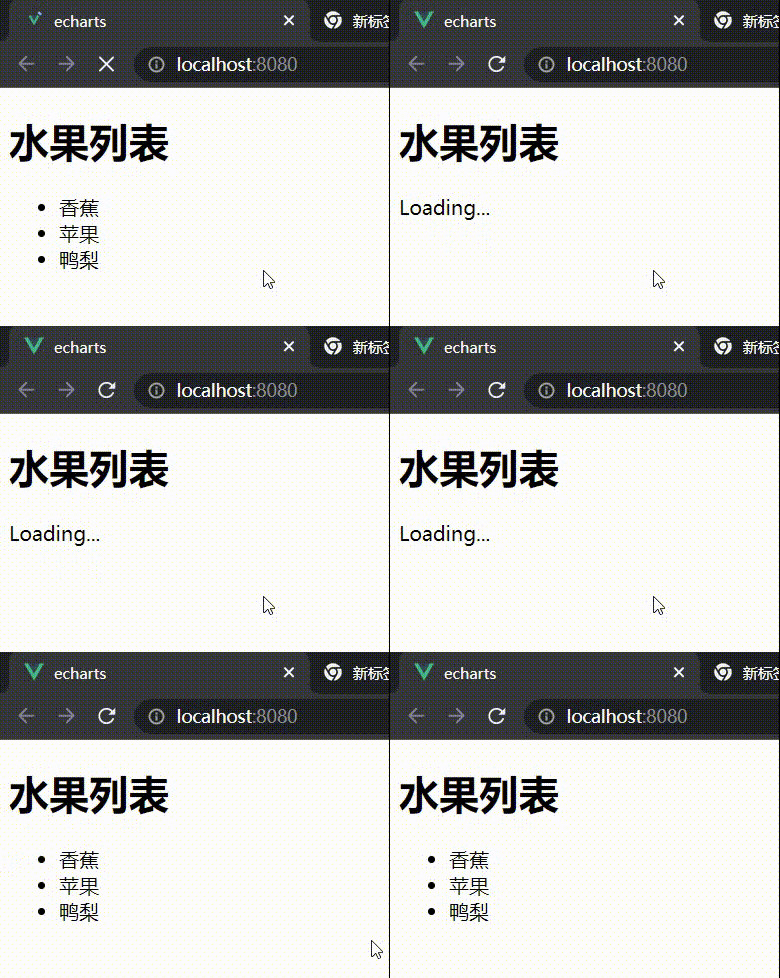
这个我们可以来做加载动画,未加载完成显示【loading...】
我们可以使用v-if来实现,通过一个值为loading的布尔变量,当组件创建完毕前,取loading为true,当获取到数据后,去loading为false
<template> <div id="app"> <h1>水果列表</h1> //使用v-if,通过设定好的布尔值来判断是否渲染DOM <p v-if="loading">Loading...</p> <ul v-if="!loading"> <li v-for="(item,index) of fruitList" :key="index"> {{item}} </li> </ul> </div> </template> <script> export default { data () { return { fruitList:[], loading:true, } }, methods: { getData() { //通过计数器,模拟一个ajax获取数据的方法 setTimeout(()=> { this.fruitList = ["香蕉","苹果","鸭梨"] this.loading = false //获取数据后,使loading取值为false,即加载动画消失 },2000) } }, created() { this.getData() } } </script> <style> </style> 


