- A+
在地图开发中使用自定义图标(icon)在地图上表达专题信息十分常见
leaflet中常使用L.marker添加图标L.icon,非常方便
给定坐标将图标固定在地图中的某个位置,由于图标是有具体大小,并且大小固定不变,在缩放过程中有明显感觉随着地图比例尺缩小,图标会有一定的偏移
这篇文章主要介绍使用L.icon的iconAnchor属性解决自定义图标偏移问题
1 问题复现
上代码 (后面有完整代码)
<script> // 高德卫星影像 const layerC = L.layerGroup([ L.tileLayer('https://webst0{s}.is.autonavi.com/appmaptile?style=6&x={x}&y={y}&z={z}', { maxZoom: 18, maxNativeZoom: 16, minZoom: 3, attribution: '高德地图 AutoNavi.com', subdomains: '1234' }) ]) var map = L.map('map', {attributionControl: false, layers: [layerC]}).setView([29.324720, 112.494506], 13); const defaultLatlng = [29.324720, 112.494506] // 添加圆形 显示定位点 L.circle(defaultLatlng, {radius: 100, color: 'red'}).addTo(map) // 默认图标 L.marker(defaultLatlng).addTo(map) const iconLatlng = [29.31080, 112.50291] // 自定义图标 const icon = L.icon({ iconUrl: './船.png', iconSize: [37, 53], // 设置图片大小 宽度50.高度100 }) L.circle(iconLatlng, {radius: 100, color: 'red'}).addTo(map) L.marker(iconLatlng, {icon: icon}).addTo(map) </script> 

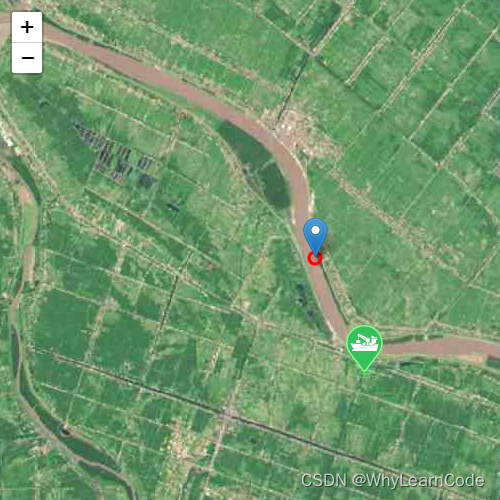
使用红色小圆圈展示图标的定位点
使用默认图标,图标的下方在红色圆圈中心
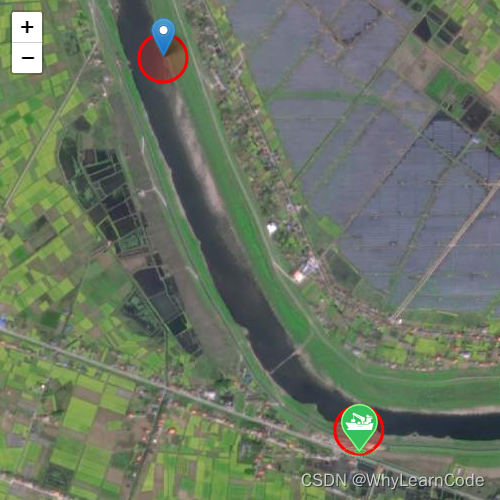
使用自定义图标,最开始图标直接挡住了红色圆圈,放大后慢慢的图标显示在红色圆圈里面,在缩放的过程中自定义图标的最下方有明显的偏移(底部指向的位置一直在变)
2 解决方案
探究是什么导致默认图标和自定义图标的区别
leaflet没有开启canvas绘制,图标都是dom元素叠加在底图上
查看dom元素的css样式


从图标样式中可以看出,图标使用了margin属性来实现图标位置的调整
与默认图标相比,自定义图标的margin-top只是height的一半
使用iconAnchor属性调整一下
const icon = L.icon({ iconUrl: './采砂船正常.png', iconSize: [37, 53], // 设置图片大小 宽度50.高度100 iconAnchor: [18.5, 53] }) 
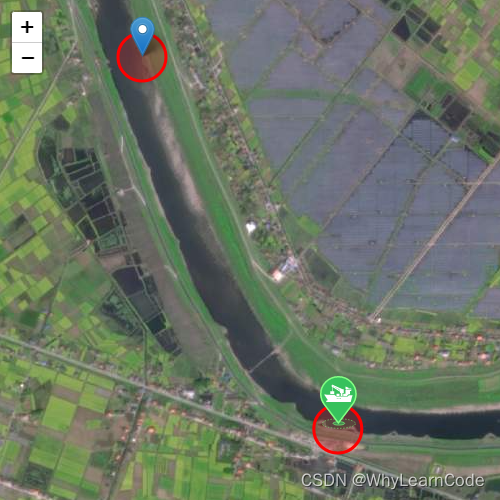
自定义图标缩放的效果没有偏移的感觉了
完整代码
<!DOCTYPE html> <html lang="en"> <head> <meta charset="UTF-8"> <meta http-equiv="X-UA-Compatible" content="IE=edge"> <link rel="stylesheet" href="https://unpkg.com/leaflet@1.9.3/dist/leaflet.css"/> <!-- Make sure you put this AFTER Leaflet's CSS --> <script src="https://unpkg.com/leaflet@1.9.3/dist/leaflet.js"></script> <meta name="viewport" content="width=device-width, initial-scale=1.0"> <title>Document</title> </head> <body> <div id="map" style="height: 500px; width: 500px"></div> <script> // 高德卫星 const layerC = L.layerGroup([ L.tileLayer('https://webst0{s}.is.autonavi.com/appmaptile?style=6&x={x}&y={y}&z={z}', { maxZoom: 18, maxNativeZoom: 16, minZoom: 3, attribution: '高德地图 AutoNavi.com', subdomains: '1234' }) ]) var map = L.map('map', {attributionControl: false, layers: [layerC]}).setView([29.324720, 112.494506], 13); const defaultLatlng = [29.324720, 112.494506] // 添加圆形 显示定位点 L.circle(defaultLatlng, {radius: 100, color: 'red'}).addTo(map) // 默认图标 L.marker(defaultLatlng).addTo(map) const iconLatlng = [29.31080, 112.50291] // 自定义图标 const icon = L.icon({ iconUrl: './船.png', iconSize: [37, 53], // 设置图片大小 宽度50.高度100 iconAnchor: [18.5, 53] }) L.circle(iconLatlng, {radius: 100, color: 'red'}).addTo(map) L.marker(iconLatlng, {icon: icon}).addTo(map) // map.on('click', e => { // console.log(e.latlng) // }) </script> </body> </html> 3 结论
出现这个偏移的感觉主要是由数学坐标系和屏幕坐标的区别导致的。
在数学坐标系中,中心是原点,向上是y轴正方向,所以我们常将一个图标的底部作为这个图标的定位点
但在屏幕坐标系,是以左上角作为坐标原点,右方向作为x轴正方向,下方向作为y轴正方向

在屏幕坐标系中,图标左上角固定不变,缩放过程中,底部指向的位置一直在变,给人感觉就是图标在慢慢偏移
使用marker默认图标x和y会自动偏移,使用自定义图标需要手动偏移
iconAnchor参数是反符号偏移 [18.5, 53] 对应的样式是margin-left: -18.5 和 margin-top: -53


